
How to Get the 90s Direct-Flash Photo Look
Create a convincing 90s direct-flash look by getting the light right first, then shaping contrast, color, grain, and falloff.
 FilmFX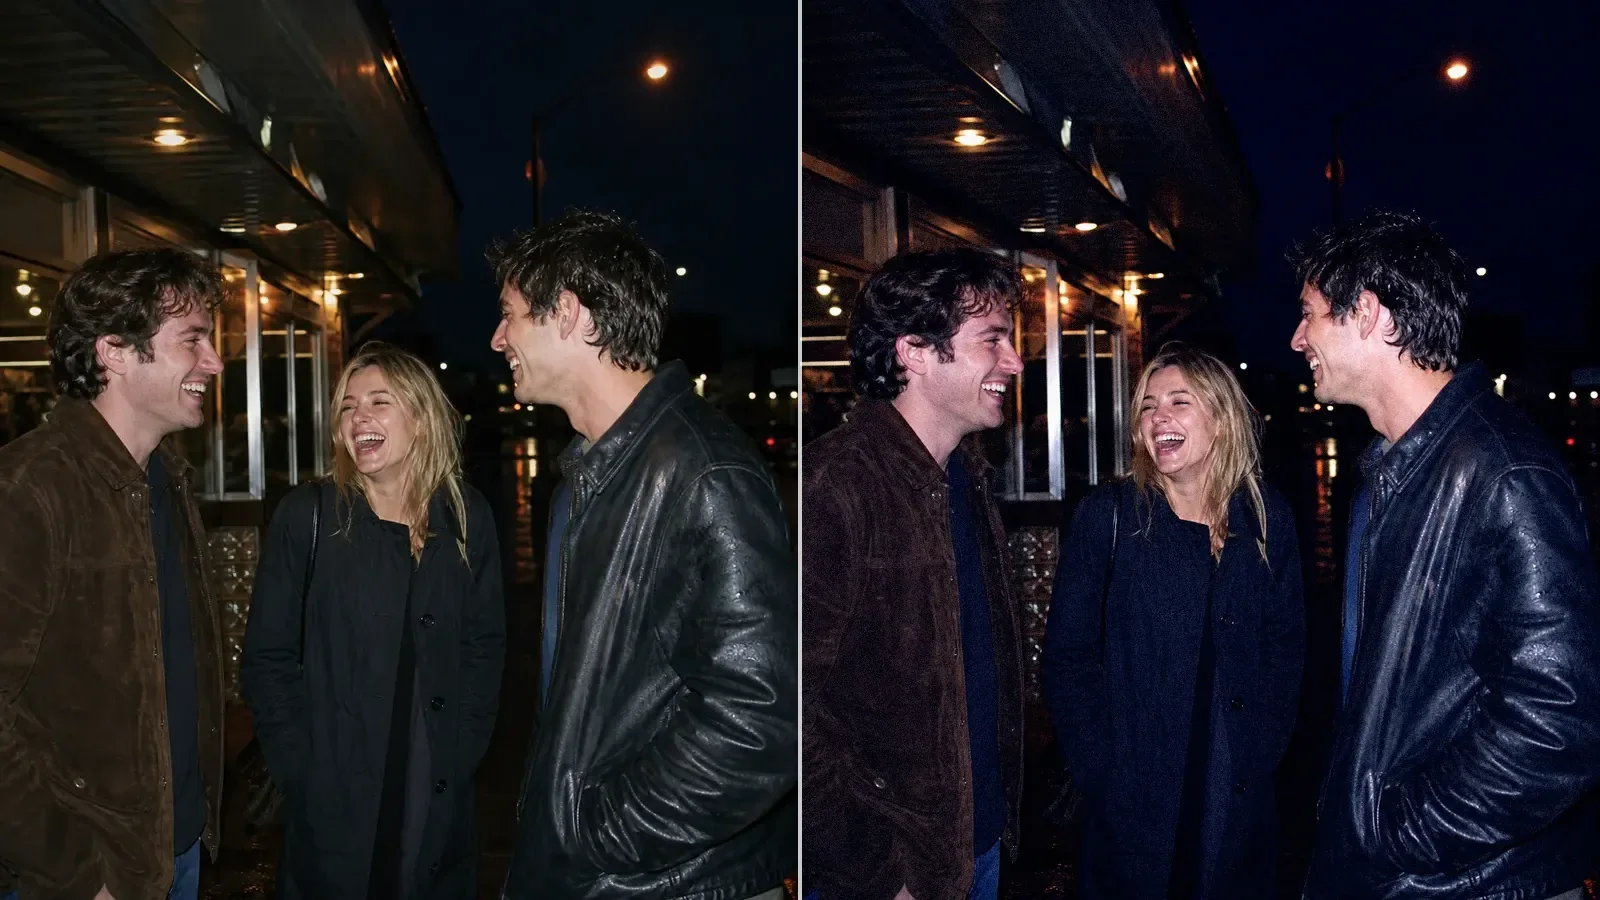
The quickest way to get a convincing 90s direct-flash photo look is to use direct flash while taking the picture. Editing can shape the color, contrast, grain, and corner falloff, but it cannot fully invent the hard shadow, bright foreground, and dark background created by a small light close to the lens.
That bluntness is the point. A good result can feel immediate, social, and slightly imperfect. If you polish every reflection and soften every shadow, the picture loses the thing you were trying to keep.
What direct flash changes in the photograph
A small flash near the lens sends light straight toward the subject. Close faces and clothing become bright, shadows fall sharply behind them, reflective surfaces flare, and the background receives much less light.
This is why a direct-flash photo is not simply a warm vintage preset. The lighting has already separated the subject from the room before any color treatment begins.
The effect is strongest when:
- The subject is fairly close to the camera.
- Ambient light is lower than the flash exposure.
- The background sits several steps behind the subject.
- The camera is near eye level rather than far above or below.
- Some reflective detail—glass, jewellery, glossy paint, or a bright eye catchlight—stays in the frame.
How to shoot it on a phone or compact camera
Set the flash to On, not Auto. Auto flash may decide the room is bright enough and leave you with an ordinary low-light exposure.
Use the rear camera when possible; its flash is usually more useful than screen-based selfie illumination. Stand roughly one to two metres from a person, take one frame, and adjust your distance. Moving closer makes the foreground brighter and the falloff more obvious. Moving back lets more of the room participate.
Avoid digital zoom. Step closer instead. A wider view with a close subject usually feels more like a party snapshot than a distant, compressed portrait.
If the face is featureless white, lower exposure or move back. If the background is completely black and the place matters, allow a little more ambient exposure or move the subject closer to the background.
The room should still leave a clue
The best direct-flash frames usually retain one or two environmental signals: colored lights, a doorway, a table, someone else in the background, or a strip of night sky. Those clues turn a bright face in darkness into a remembered place.
Do not lift every shadow afterward. Dense dark areas are part of the look. Keep detail where it explains the event and let unimportant corners disappear.
For available-light night work, this tripod-free night street guide is the better starting point. Direct flash is a different visual decision, not merely a solution for insufficient light.
Edit contrast before adding a color cast
First check the face and the nearest light-colored object. Pull back any clipped highlight that still contains recoverable detail, then decide how dense the blacks should remain.
Do not flatten the whole image in an attempt to reveal the room. A direct-flash frame often needs a firm transition from bright foreground to dark background. The useful adjustment is usually local in feeling: protect skin, keep the subject crisp, and avoid turning distant shadows into gray fog.
Color can be cool, warm, or slightly wrong
There was no single 90s lab color. Film stock, processing, paper, aging, scanning, and the room’s own light all changed the result. A cool cast can feel like late-night flash; a warmer cast can feel more like a family album; mixed green and amber light can suit a club or restaurant.
Choose the version that supports the event. If skin is already orange under warm bulbs, adding another strong warm treatment is rarely helpful. Keep one familiar white object or skin area as your reference while adjusting strength.
Grain should not hide the flash detail
Direct flash creates sharp small details: eyelashes, fabric, dust, reflections, and hard shadow edges. Heavy grain can erase those clues and turn every surface into the same texture.
Start with moderate grain. Use more only if the frame is deliberately rough or the final output will remain small. High-ISO phone noise and film-style grain are different; reducing colored digital noise before adding texture often gives a cleaner result.
A quick FilmFX recipe
- Open the 90s photo filter and upload the direct-flash frame.
- Try Night Flash '99 for a cooler, harder night feel, or Pocket Flash 2004 for a warmer compact-camera mood.
- Begin around 60–75% strength and drag the divider across the face, a reflection, and the background.
- Keep the bright foreground, but lower the effect if skin loses all variation or white clothes take on a heavy cast.
- Export at the original size if you want to preserve the source dimensions.
The disposable-camera filter collection is a useful second comparison when you want more warmth, corner falloff, or casual daytime color rather than a night-club look.
Can an ordinary photo be turned into a flash photo?
It can be pushed in that direction, but the limit is visible. You may deepen the background, brighten the subject, add a harder tonal curve, and choose flash-like color. You cannot recover a cast shadow that was never made or a reflection that never caught the light.
Use a non-flash source only when it already has a bright, front-lit subject and a darker environment. Otherwise the edit becomes a spotlight effect rather than direct flash.
One practical note before using flash around people
Ask before firing flash close to strangers, performers, drivers, children, or anyone who may be distracted or uncomfortable. Avoid repeated bursts at close range. The photograph should feel immediate; the experience of making it does not need to feel intrusive.
The strongest 90s-style frame usually comes from one clear lighting choice, a small amount of color shaping, and enough restraint to leave the awkward edges intact.